Quick Start - Getting Started
Welcome to Meeting Schedule Assistant!

So you don't want to read the Help File contents, you just want to get started! OK, follow these vital steps, and you are on your way!
- Step 1 — Custom Assignments
- Step 2 — Databases
- Step 3 — Other Settings
- Step 4 — Backup Settings
- Step 5 — Date Range
- Step 6 — Create Schedule
Step 1 — Custom Assignments
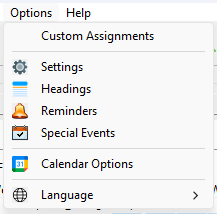
Use the Custom Assignments Manager to add in any additional assignments into the software to meet the needs of your congregation.
Step 2 — Databases
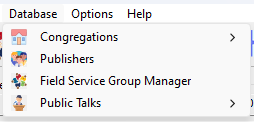
Populating the databases is the next thing that needs to be done.

Congregations
The Congregations database is designed for the Public Talk Coordinator to use. You can manage congregations, their respective speakers and which talk outlines they give. It also has it's own report viewer.
You must add your own Congregation as a minimum, and set it as Local, even if you don't add any speakers. The easiest way to do this is by clicking the Add Congregation hyperlink on the status bar:

 Several parts of the software rely on this Local Congregation setting. Don't forget to set both Meeting Day / Time properties.
Publishers
The Publishers database is deigned for the Life and Ministry Meeting Overseer, Coordinator of the Body of Elders, and any one else who has a responsibility of oversight for scheduling (e.g. Sound Overseer / Attendant Overseer).
Here is a sample of the types of information you can manage for each Publisher:
- Assignments
- Availability
- Field Service Group
It also has it's own report viewer.
Public Talks
The Public Talks database is designed for the Public Talk Coordinator. Keep track of when when talk outlines have been requested and if they have digital media. You can also indicate if a particular talk outline is excluded.
Step 3 — Other Settings

We are nearly ready to start using the software! Just a few more things to do.
- Settings — Fine-tune how the two editors will work on the Settings window. E.g. Day of Meeting / Automatic Backup.
- Headings — Confirm how you want the Headings to appear on your Assignment History schedules.
- Special Events — Specify any upcoming dates for Special Events (Theocratic).
- Calendar Options — Connect to your Google / Outlook Calendars for synchronization.
Step 4 — Backup Settings
Make a Backup so that you can quickly get back up and running in a disaster-recovery situation. This can be done from the Toolbar or File menu.
Step 5 — Date Range
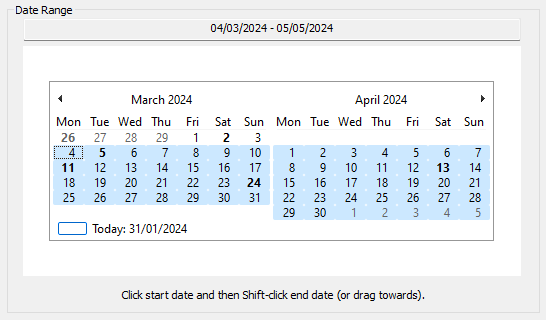
Exit back to the main window and select a date range:

A date range can be selected in several ways:
- Click the start date and drag the cursor to the end date.
- Click the start date and Shift-click the end date.
- Click on the start date, hold down the Shift key and use the LEFT/RIGHT arrow keys to move to the end date.
Step 6 — Create Schedule
Create the schedule and continue with the Assignments Editor or Meeting Editor.

 ... and that is basically it! If you want to know more, make a cup of tea, sit back and check out the remainder of the help documentation.
