Authorisation
To use the Outlook Calendar feature, you’ll need a valid Outlook or Hotmail account. Meeting Schedule Assistant must be authorised to access your calendars, and this process normally only needs to be completed once.
⚠️ Internet access required:
If you use a software firewall, you may see prompts asking whether to allow the application to connect to the internet. Choose Allow when prompted.
Outlook Calendar synchronisation uses a one‑time OAuth2 sign‑in process. Once authorised, Meeting Schedule Assistant can create and update events in your Outlook calendars.
Step 1 — Begin Authorisation
Press the Sign In button to begin the process:
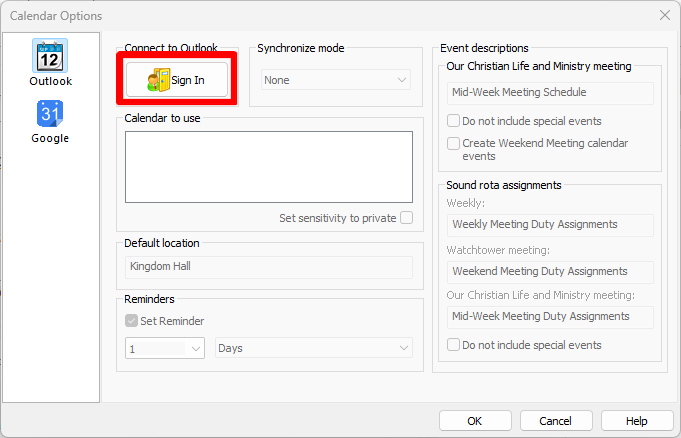
Figure 156. Outlook tab showing the Sign In button.
⚠️ Important: Review the message carefully before continuing.

Figure 157. Outlook authorisation message.
Step 2— Enter the Code
The form below will appear in your browser. Simply paste the code (which is already on the clipboard) into the designated field and click Next.
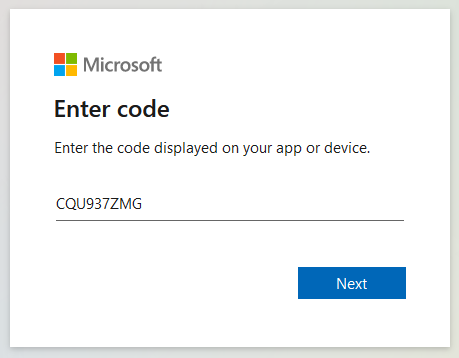
Figure 158. Microsoft code entry page.
Step 3— Choose an Account
Sign in using the Outlook / Hotmail account you want to synchronise. Enter your password when prompted and continue.

Figure 159. Microsoft sign‑in page.
Step 4— Grant Permission
Review the consent screen and click Next to continue.

Figure 160. Microsoft verification page.
Click Accept to grant the required permissions.
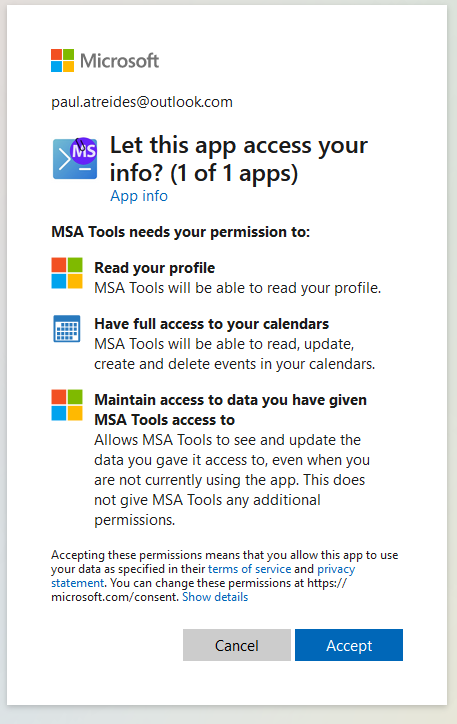
Figure 161. Microsoft consent page.
You should now see this window, indicating that the sign-in process has been completed:
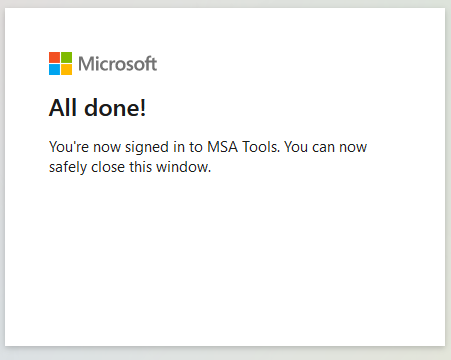
Figure 162. Microsoft confirmation page.
Once the authentication procedure is complete, you will be able to utilize the calendar synchronization features within Meeting Schedule Assistant.
Step 5— Security Notification Email
After completing authorisation, Outlook may send you a security notification email confirming the activity. This is normal and requires no action.
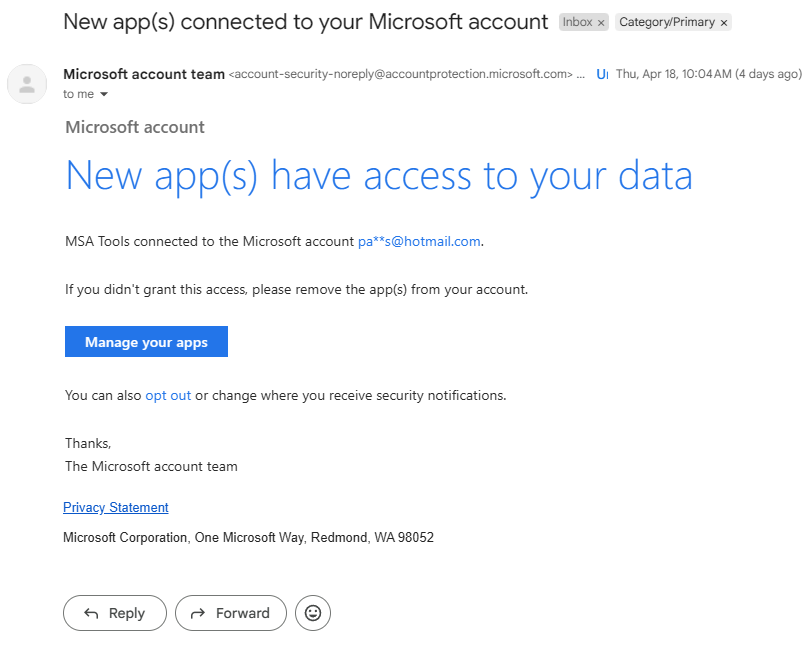
Figure 163. Microsoft security notification email.
Calendar List
Only calendars that you own (can write to) will be shown in the calendar list. From now on you should not need to authenticate. The rest of the options are all explained in the Outlook Calendar help topic.

Figure 164. Outlook calendars list.
Revoking Access
Click Sign out to revoke authorisation at any time. You will need to repeat the authorisation process if you want to reconnect later.
Related Topics
Navigation
- Parent topic: Outlook Calendar