Edit Assignment Material
Click the Edit assignments material button on the Meeting Editor to display this window.


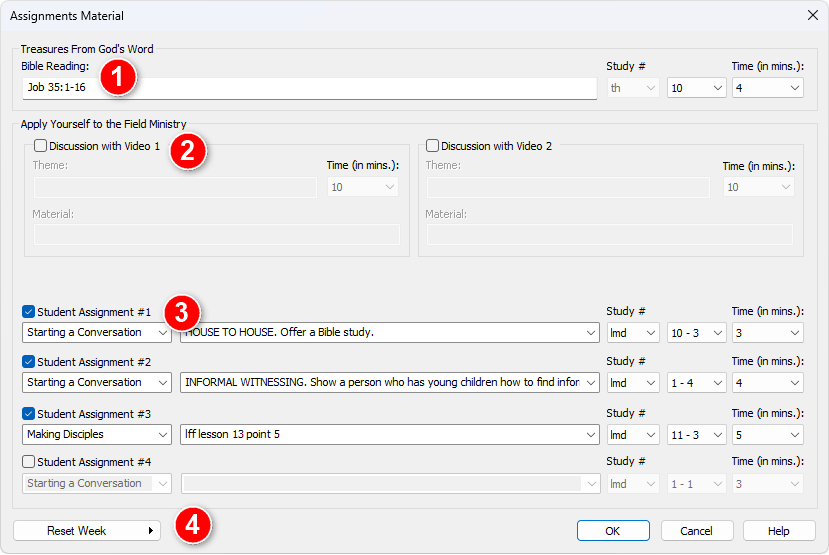
Use the Assignments Material window to provide all the key information for the Apply Yourself to the Field Ministry section of the midweek meeting.
Under normal circumstances you will not have to display this window, since the volunteers who provide the monthly data will fill it in for you. However, if you are using a language that doesn't have a volunteer, or if you are preparing your schedule in advance of the volunteer then you will need to specify this information.
The Assignments Material window has 4 main sections:
- Section 1 — Discussion Items
- Section 2 — Student Items
- Section 3 — Reset
 Did you know that you can use CTRL + I and CTRL + B to automatically add the italic / bold tags to the selected text?
Section 1 — Discussion Items

Discussion (with Video) items are assigned to an Elder or Ministerial Servant. Input the information as provided in the Meeting Workbook.
- Set the check-box to activate the controls.
- Enter the theme and material.
- Select the duration (in minutes) from the drop-list or type in a new value.
 Select the brothers who will be giving these items by clicking the Edit discussion with video assignments button on the Meeting Editor.
Section 2 — Student Items

The Meeting Editor can include up to four student assignments in the Apply Yourself to the Field Ministry section of the meeting. Input the information as provided in the Meeting Workbook.
- Set the check-box to activate the controls for each student item.
- Select the type of student assignment from those in the drop-list.
- Enter the material information (can be pasted from the Meeting Workbook).
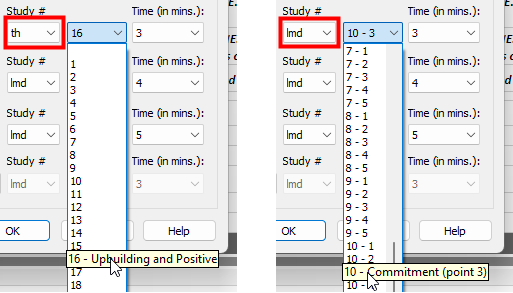
- Select the correct brochure for the study reference. Choose from:
- th — Teaching brochure.
- lmd — Love People brochure.

The brochure setting affects the available list of study references.
- Select the duration (in minutes) from the drop-list.
 You can add your own student assignment descriptions if required. Use the Customize Lists feature in the Meeting Editor to do this.
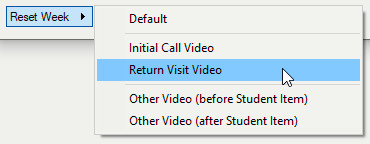
Section 3 — Reset
|
A small pop-up window is displayed when you press the button where you can select how you would like to reset to. The controls will then update to an agreed set of default values. |
|

