How to customize CSS stylesheet
How do you customize the CSS styles?
Here are some reasons why you might want to customize the existing CSS styles:
- You are including custom content on your schedule and you created new classes.
- You want to enhance an existing class in a way that the Report Settings window does not support.
Worked Example
Task: You want to set a background colour and surrounding border for the Report Title. These settings are not exposed on the Report Settings window (scenario 2).
Step 1
- Start the Assignments Editor by creating a new schedule or opening an existing one.
- Select the Preview tab.

Step 2
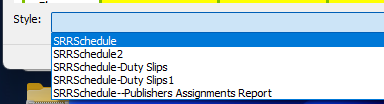
- Select "SRRSchedule" from the Styles list.
Step 3
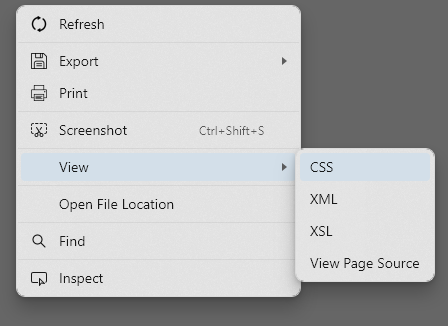
- Right-click the schedule and select View -> CSS from the context menu and it should open the stylesheet in the built-in text editor.
Step 4
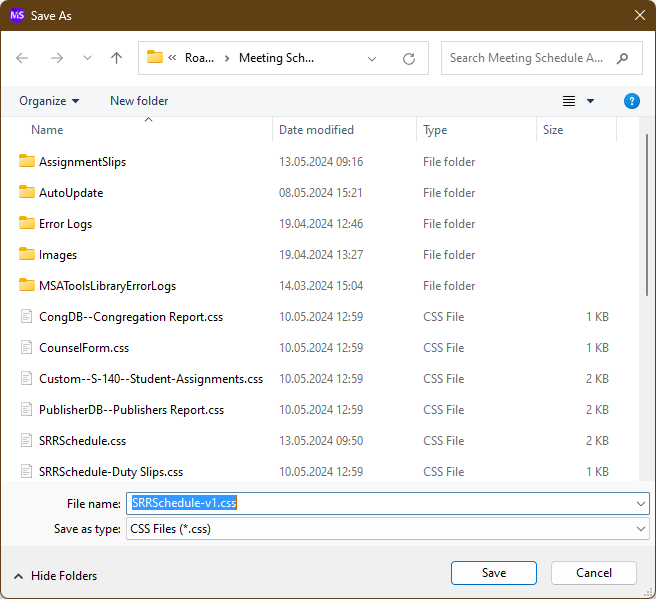
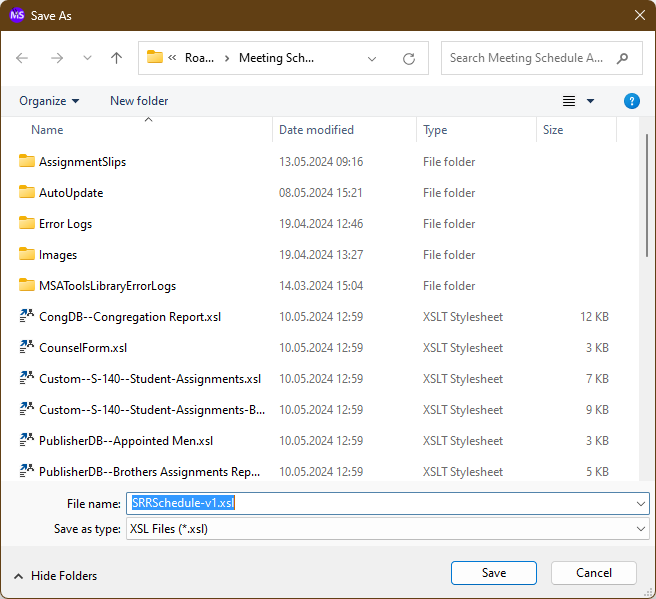
- Save the stylesheet with a new name (File > Save As File ...). Rename it by added a suffix (eg: "-v1"):
Step 5
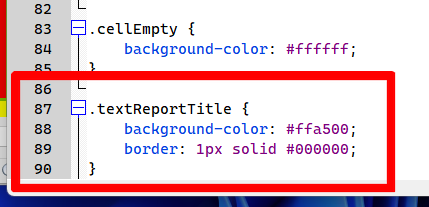
Add the following class to the end of the new document:
|
.textReportTitle { |
It shouuld now look like this:
Step 6
- Save the CSS file and close the Script Editor.
Step 7
- Right-click the schedule and select View -> XSL from the context menu and it should open the template in the Script Editor.
- Save the template with a new name (File > Save As File ...). Rename it by added a suffix (eg: "-v1"):
Step 8
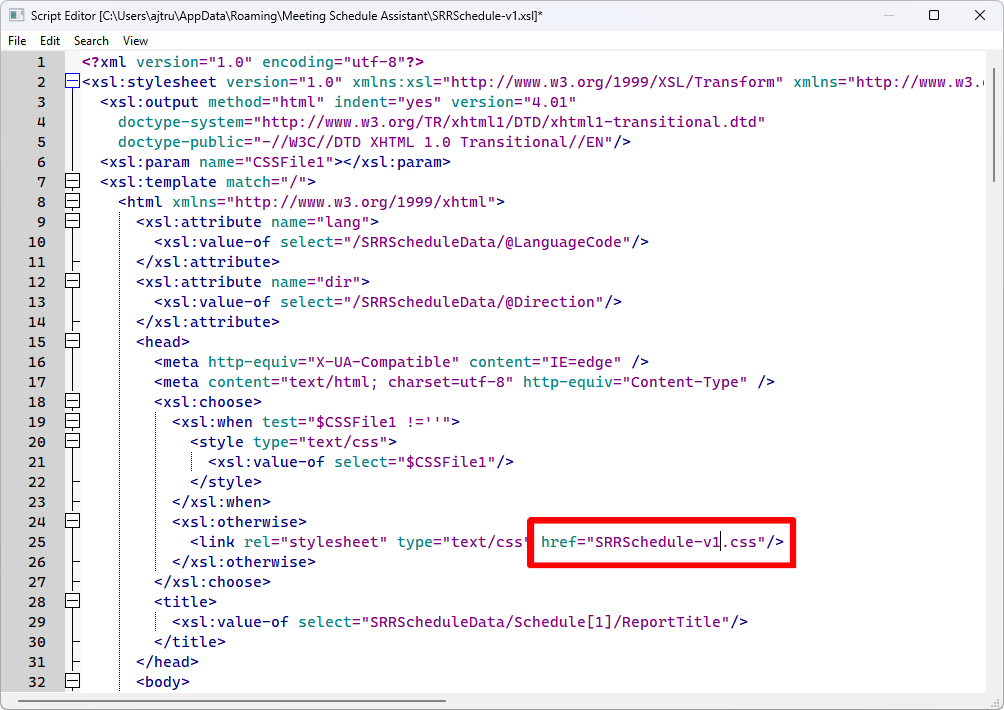
- Change the name of the linked CSS file to the new file. Do this by locating the line which has the word link:
Step 9
- Save the template and close the editor.
Step 10
- Select the new style from the droplist:
