
I am pleased to announce that there is a new version of Meeting Schedule Assistant now available.
What’s New
All screen shots have been updated in the help documentation. I decided to use a different skin called Corporate when making the new images. I think this Windows Blinds skin is very clean and fresh!
I have also decided to remove the following help topics from the documentation:
- Demonstrations Manager
- Managing student Study Points.
- Students Menu
The Demonstrations Manager help topic was removed because I decided to remove this feature from the Midweek Editor. It has been a long time since we needed to make our own arrangements as we use pre-recorded videos more and more.
The latter two help topics were removed since they no longer apply. Study points are provided in the workbooks so we have no need to manage study points any more.
There have been several enhancements in this edition that we hope you will find useful during your scheduling.
Upgraded Status Bars
The status bar has been upgraded on both editors. For example, it is now possible to change some of the settings from the status bar.
Midweek Editor:

Assignments Editor:
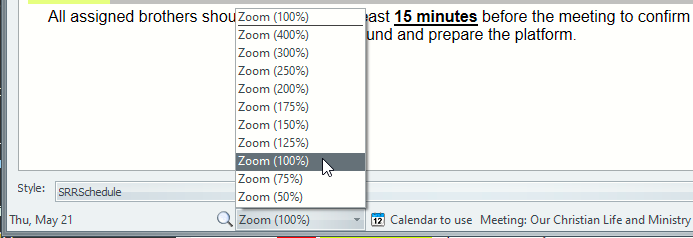
Note that the zoom controls are only enabled in the Assignments Editor when you are using the Preview Mode.
Video Conferencing
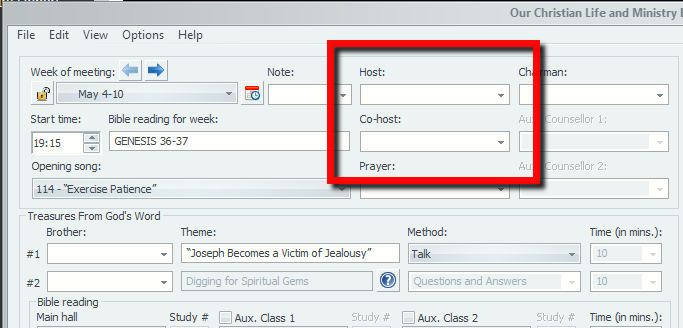
In the light of the ongoing COVID-19 pandemic it has been decided to add two new Video Conferencing assignments to the Midweek Editor for:
- Host
- Co-host
All publishers who have the Midweek Meeting assignment will be displayed in the drop-down list in the editor.
You can also allocate these assignments for the Weekend Meeting:
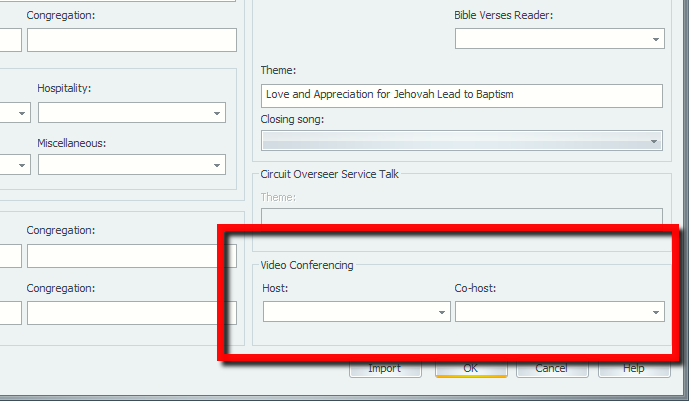
Please note that the drop-down lists on the Weekend Meeting window are dynamic controls. To quote the help topic:
These are dynamic drop-down lists. Typing in a new name and closing the dialogue with OK will cause that name to become available in the drop-down list next time. Likewise, hovering the mouse over a name in the drop-down list and pressing DEL will cause it to be permanently removed (as long as you subsequently close the dialogue with OK!).
Managing Weekend Meeting information
All default Workbook templates have been updated to include these new assignments on your schedule. For example:
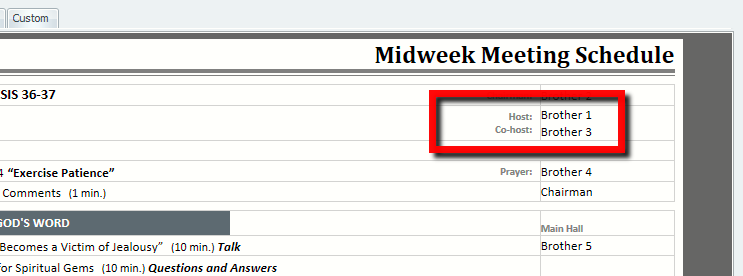
It is entirely optional to assign the Host and Co-host. I have updated the templates in such a way that the new labels will only display if both assignments have been assigned.
Are you using a custom template and would like to make the changes needed to see these new assignments? Add the following highlighted lines of code here to your template:
                </xsl:otherwise>
              </xsl:choose>
            </xsl:if>
          </td>
        </tr>
        <xsl:call-template name="MidweekVideoConferenceInfo"/>
        <xsl:apply-templates select="Note"/>
        <tr>
          <td colspan="4"> </td>
        </tr>
        <tr>
          <xsl:apply-templates select="SongOpen" />
          <xsl:apply-templates select="PrayerOpen" />
        </tr>
        <xsl:apply-templates select="OpeningComments" />
      </xsl:if>
    </table>
  </xsl:template>

    <xsl:template name="MidweekVideoConferenceInfo">
    <xsl:if test="VideoConferenceHost != '' and VideoConferenceCohost != ''">
      <tr>
        <td colspan="3">
          <div class="floatRight">
            <xsl:value-of select="//Labels/VideoConferenceHost"/>
            <br/>
            <xsl:value-of select="//Labels/VideoConferenceCohost"/>
          </div>
        </td>
        <td class="cellName">
          <xsl:apply-templates select="VideoConferenceHost"/>
          <br/>
          <xsl:apply-templates select="VideoConferenceCohost"/>
        </td>
      </tr>
    </xsl:if>
  </xsl:template>

  <xsl:template name="WeekendVideoConferenceInfo">
    <xsl:if test="Assignments/VideoConferenceHost != '' and Assignments/VideoConferenceCohost != ''">
      <tr>
        <td class ="cellWEEKEND" colspan="2">
          <div class="floatRight">
            <xsl:value-of select="//Labels/VideoConferenceHost"/>
            <br/>
            <xsl:value-of select="//Labels/VideoConferenceCohost"/>
          </div>
        </td>
        <td class="cellName">
          <xsl:apply-templates select="Assignments/VideoConferenceHost"/>
          <br/>
          <xsl:apply-templates select="Assignments/VideoConferenceCohost"/>
        </td>
      </tr>
    </xsl:if>
  </xsl:template>

  <xsl:template name="MEMORIAL-WEEKEND">
The other change required is:
        </td>
        <td class="cellName">
          <xsl:value-of select="Assignments/Chairman"/>
        </td>
      </tr>
      <xsl:call-template name="WeekendVideoConferenceInfo"/>
      <xsl:apply-templates select="HomeTalk"/>
      <xsl:apply-templates select="AwayTalk"/>
      <xsl:apply-templates select="Assignments"/>
    </table>
  </xsl:template>

  <!--Displays the Home Talk Speaker details-->
  <xsl:template match="HomeTalk">
    <tr>
      <xsl:apply-templates select="Time" mode="End"/>
      <td class="cellWEEKENDText">
        <div class="floatRight">
          <xsl:value-of select="//Labels/PTS_Congregation"/>:
        </div>
        <span class="textPTSLabel">
          <xsl:value-of select="//Labels/PTS_Speaker"/>:
        </span>
        <xsl:text> </xsl:text>
        <span class="textPTSValue">
          <xsl:value-of select="Speaker"/>
        </span>
      </td>
      <td class="cellName">
The above code changes will display the new assignments for both Midweek Meeting and Weekend Meeting. Feel free to adjust the template to meet your requirements. Learn more about Advanced Customisation if this interests you.
Legacy Workbook is back!
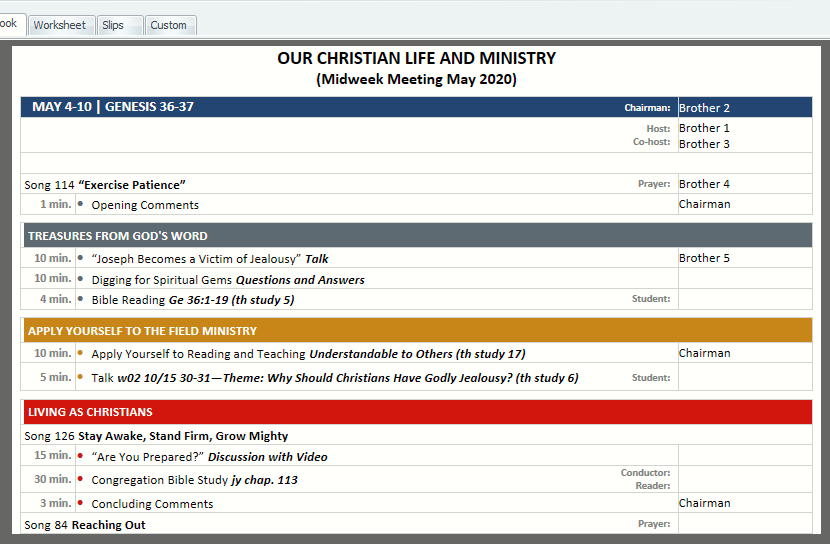
I had several requests to bring the old Workbook schedule template back. So what I have done is adjust the Workbook-S-140 template logic to make it resemble the legacy schedule.
I had to make a couple of changes to the underlying XML in order to support some of the changes that were needed. The new template is called Workbook-S-140-Legacy and looks something like this:
There are some things to keep in mind if you decide to use this template:
- At the moment the Weekend Meeting can’t be displayed. I have not looked at the needed styling change requirements. Let me know if this is something you would like added.
- The schedule is designed to be used where your congregation has no additional classes. If you try to use additional classes it will not look right.
There have been several other bug fixes and improvements made in this edition. Have a look at the Revision History for full details.
At the moment the online help documentation is not included in the results and you must continue to use the helps dedicated search feature.
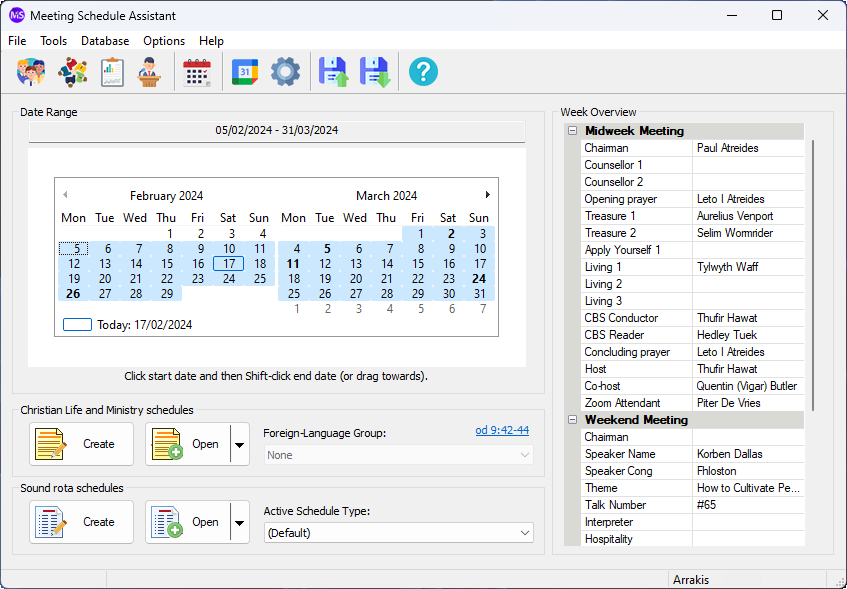
Latest Download
Supported Operating Systems
- Windows 10
- Windows 11
Deprecated Operating Systems
These operating systems are no longer supported:
- Windows 7 (Service Pack 1)
- Windows 8.1
You can still download the last supported version of Meeting Schedule Assistant (which was 23.1.0) from here. But this version is no longer maintained. You are encouraged to use version 23.1.1 or higher.
Setup the software to update automatically or upgrade by using the Check for Update feature from the Help menu.